

Please also see my previous article.
Wiring diagram and notes
Note that the terminal marked 5V on the L298 is not wired anywhere; input power from the terminal marked 12V.
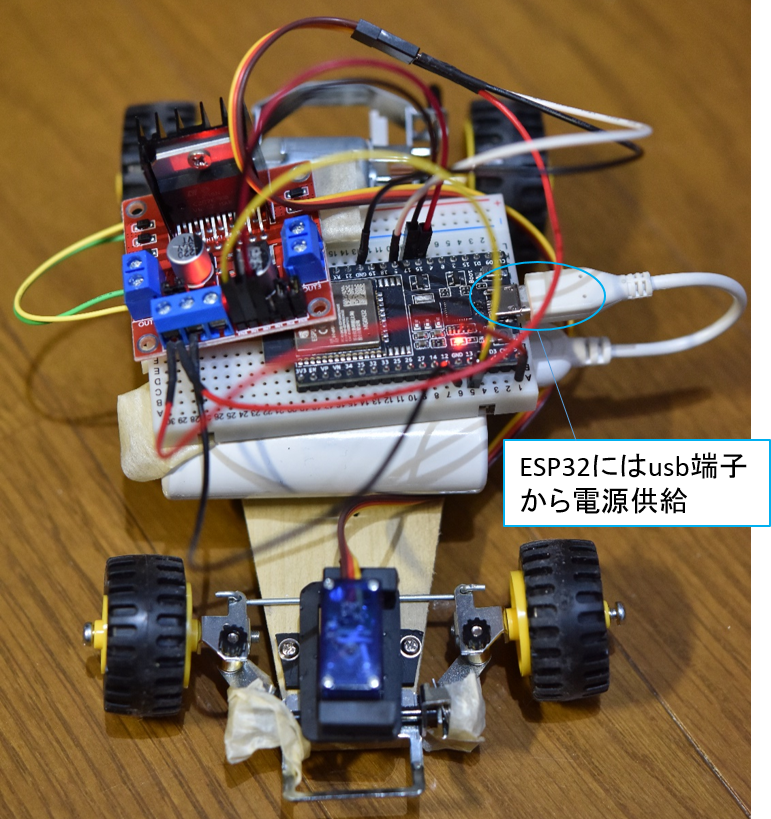
The ESP32 was powered from the usb terminal with a mobile battery.
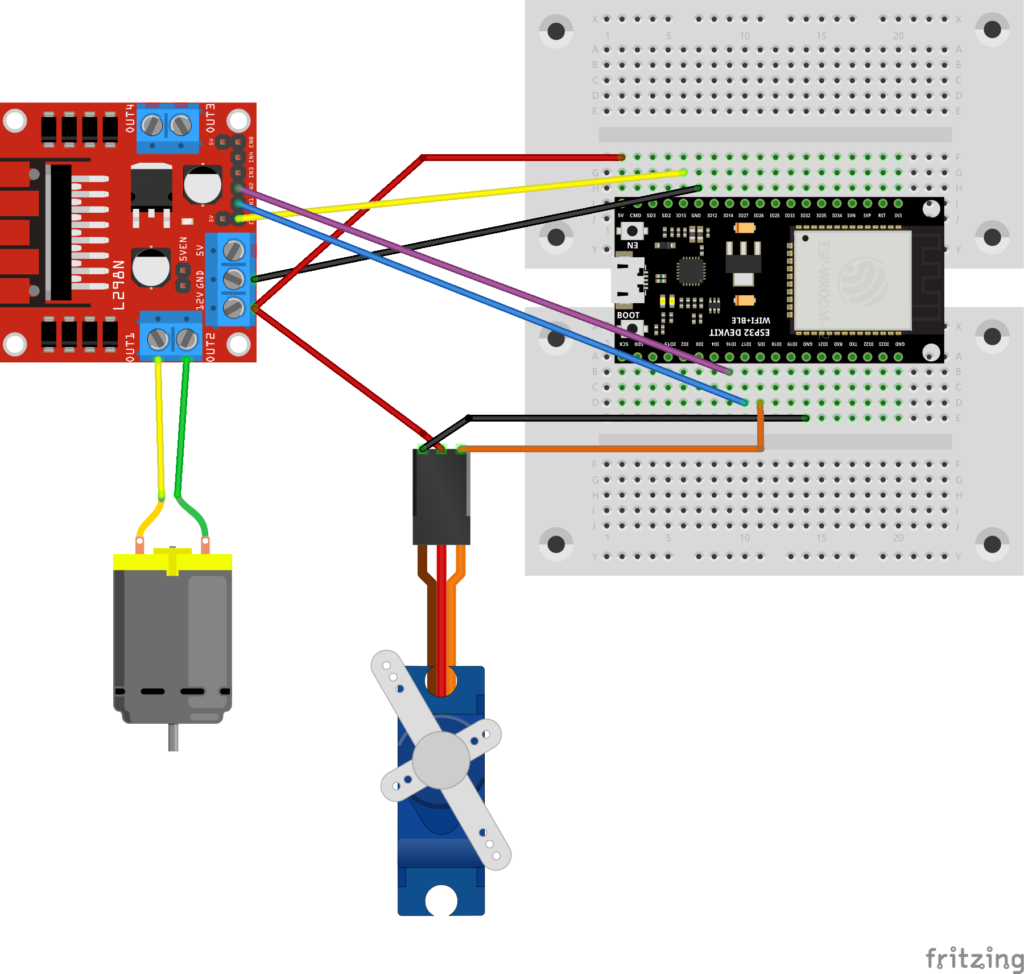
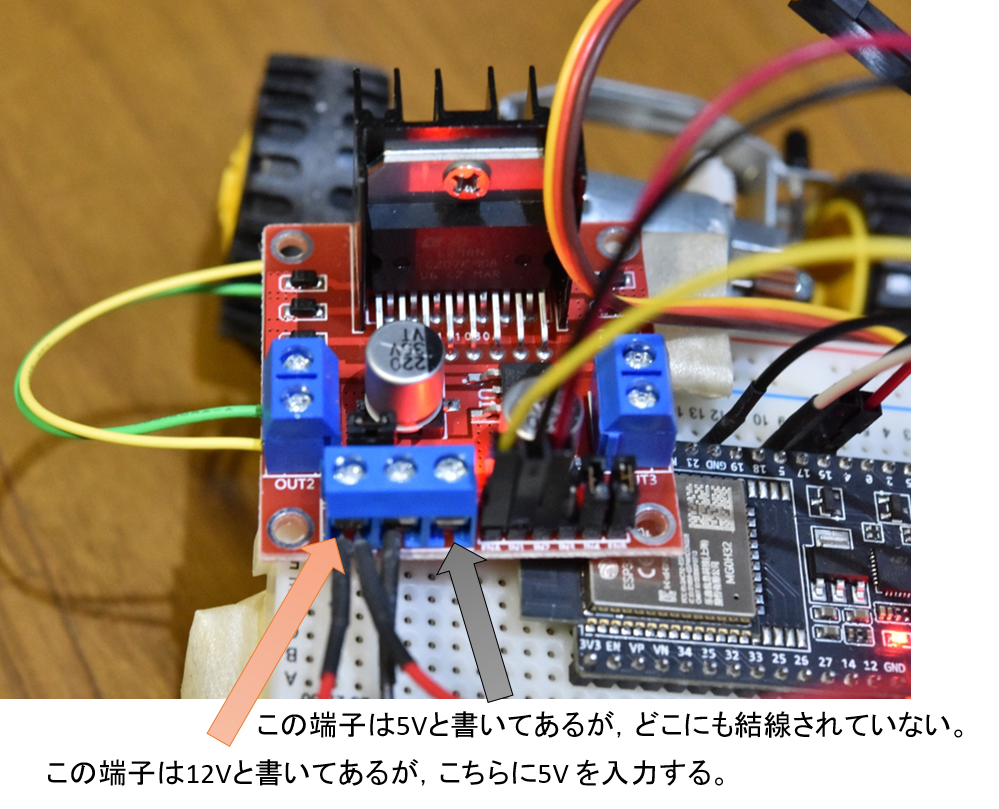
Red arrow; This terminal is marked 12V, but connect this terminal to 5V.
Code
The code is as follows. I modified the code from this site a little (mainly the settings for using the L298N motor driver).
// https://newstubby.net/diy-rc6/

#include<ESP32Servo.h>
#include <Ps3Controller.h>

#define SERVO_OUT 5 //5PIN for Servo PWM
//#define DAC1 25  //25PIN for DAC
#define ENA 13  //13PIN for L298N ENA
#define IN1 17  //16PIN for TA7291 IN1
#define IN2 16  //17PIN for TA7291 IN2
#define VREF_MAX_CW 232  // Plus Velocity limit; 3.3V * 232 /255 = 3.0V
#define VREF_MAX_CCW 127  // Minus Velocity limit; 3.3V * 127 /255 = 1.64V

#define INIT_ANGLE 90 //initial servo angle
Servo myServo;

  int joy_left_y;  //left joy stick Y axis
  int joy_right_x;  //right joy stick X axis
  int servo_angle;  //servo angle
  const int freq_servo = 50;    //servo frequency

  int vref; //TA7291 Vref, input boltage 0~255 0~3.3V

  const int freq_dc = 50;  //500;
  const int pwm_channel = 13; //0(original value) is not correct because the servo channel is also 0.
  const int resolution = 8;     //SS

  const float joy2servo = 0.1200f; //joy stick input to servo angle conversion gain


void setup() {
    //myServo.attach(SERVO_OUT);
    myServo.attach(SERVO_OUT, 500, 2400);     //
    myServo.write(INIT_ANGLE); //servo angle initialization
    myServo.setPeriodHertz(freq_servo); //SS
    Ps3.begin("**:**:**:**:**:**"); //MAC address for PS3 controller ##Note; Please input your Mac address

    pinMode(IN1,OUTPUT);
    pinMode(IN2,OUTPUT);
    pinMode(ENA, OUTPUT);     //

    //digitalWrite(IN1,HIGH); //
    //digitalWrite(IN2,HIGH); //
    digitalWrite(IN1, LOW);   //
    digitalWrite(IN2, LOW);   //
    vref = 0;
    //dacWrite(DAC1,vref);
    //dacWrite(pwm_channel,vref);             //SS
    ledcWrite(pwm_channel, vref);     //SS
    ledcSetup(pwm_channel, freq_dc, resolution);  //
    ledcAttachPin(ENA, pwm_channel);                //
    Serial.begin(115200);           //For Debug
}

void loop() {
  if(!Ps3.isConnected())
        return;

  //--------------------------------------//
  //      Left joystick Y axis           //
  //--------------------------------------//
  if( Ps3.event.analog_changed.stick.ly ){
    joy_left_y = Ps3.data.analog.stick.ly;

    //convert joystick value to VREF
    vref = abs(joy_left_y * 2);
    //------FWD control-------//
    if(joy_left_y < -10){
    //vref limit
      if(vref > VREF_MAX_CW)
        vref = VREF_MAX_CW;

      //dacWrite(DAC1,vref);
      ledcWrite(pwm_channel, vref);     //TH

      digitalWrite(IN1,LOW);
      digitalWrite(IN2,HIGH);
    }
    //------reverse control--------//
    else if(joy_left_y > 10){
    //vref limit
      if(vref > VREF_MAX_CCW)
        vref = VREF_MAX_CCW;

      //dacWrite(DAC1,vref);
      ledcWrite(pwm_channel, vref);     //TH
      digitalWrite(IN1,HIGH);
      digitalWrite(IN2,LOW);
    }
    //------STOP mortion--------//
    else{
      //dacWrite(DAC1,0);
      ledcWrite(pwm_channel, 0);     //TH
      //digitalWrite(IN1,HIGH);
      //digitalWrite(IN2,HIGH);
      digitalWrite(IN1,LOW);  //
      digitalWrite(IN2,LOW);  //
      delay(10);  //wait 10ms when joystick value within ±5 to prevent sudden reverse direction
    }
  Serial.println("vref= ");           //For debug
  Serial.println(vref);           //For debug
  Serial.println("pwm_channel= ");           //For debug
  Serial.println(pwm_channel);           //For debug
  }

   //------------------------------------//
   //     Right joystick X axis         //
   //-----------------------------------//
  if( Ps3.event.analog_changed.stick.rx ){
    joy_right_x = Ps3.data.analog.stick.rx;

    //The following can be done without, but +/- 5 is considered a blind zone.
    if(abs(joy_right_x) < 5){
      joy_right_x = 0;
    }

    //joy stick input to servo angle conversion
    //servo_angle = (int)(-joy2servo * joy_right_x + INIT_ANGLE);
    servo_angle = (int)(joy2servo * joy_right_x + INIT_ANGLE);   // +/-reverse
    myServo.write(servo_angle);
  }
  Serial.println("servo_angle=");           //For debug
  Serial.println(servo_angle);           //For debug
}
Let’s play
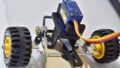
It is completed! After all, it is fun to build and play by myself instead of buying a commercially available radio controller.
The breadboard is still intact and the wiring is bare, but I don’t really care about that, so my RC baby carriage building is now closed.
コメント