

Please also see my previous article.
Part 2 (pairing PS3 controller with ESP32).
Part 3(PS3 controller controls servo motors and DC motors)
Part 4(Finishing touches on radio-controlled cars).
Need and policy for improvement of steering mechanism
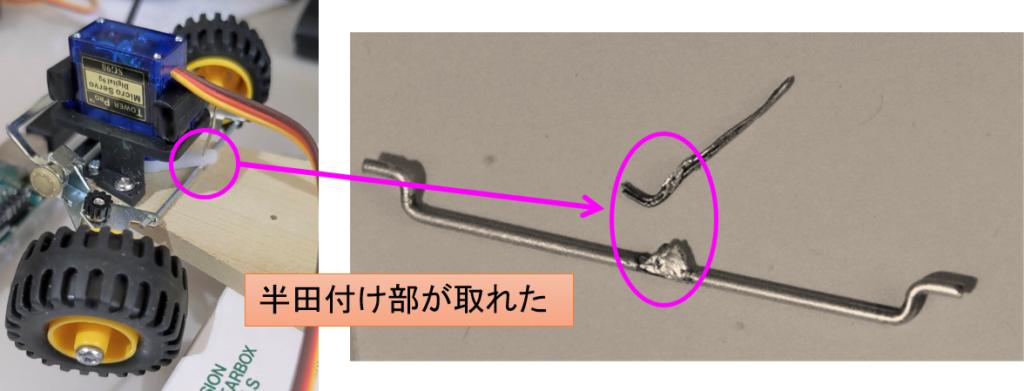
The soldered part of the mechanism used in Part.1 came off and broke. I tried to repair it by soldering, but it was difficult to fix it at just the right angle. Therefore, I decided to renew the steering mechanism.
The guidelines for improvement shall be as follows
- Must have a structure that is resistant to breakage.
- The steering mechanism should be housed in a narrow space in front of the front wheel shaft. (The large space between the front and rear wheels should be used for batteries and circuits.)
Printing parts of the steering mechanism with a 3D printer
Parts to be attached to wheel shafts and servo horns
I used the data from this site for the wheel shafts and parts to be attached to the servo horns.
Parts to fix the servo motor to the car body
The parts that fix the servo motor to the body were newly designed. The height of the front wheel damper (which allows the front wheels to move vertically) was also designed to remain. I believe there is no other example of a compact design that retains the damper and fits into the space in front of the front wheel shaft.
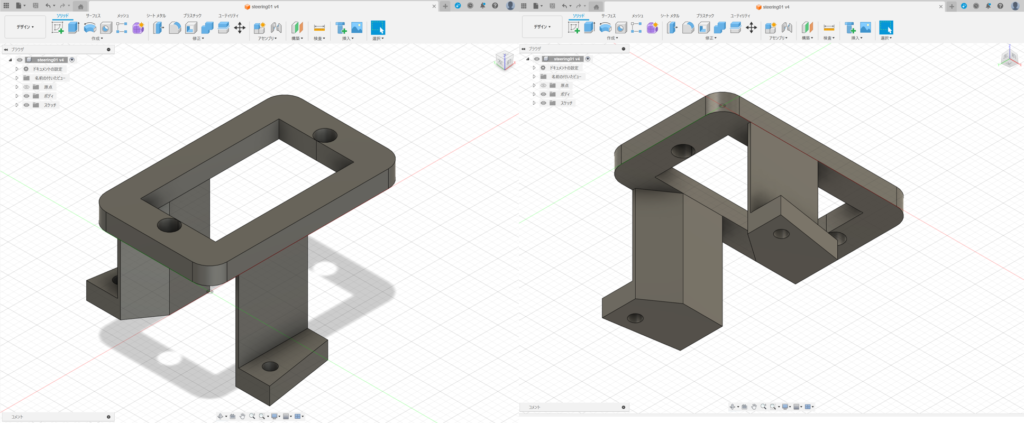
The stl data of the designed parts can be downloaded from the below.
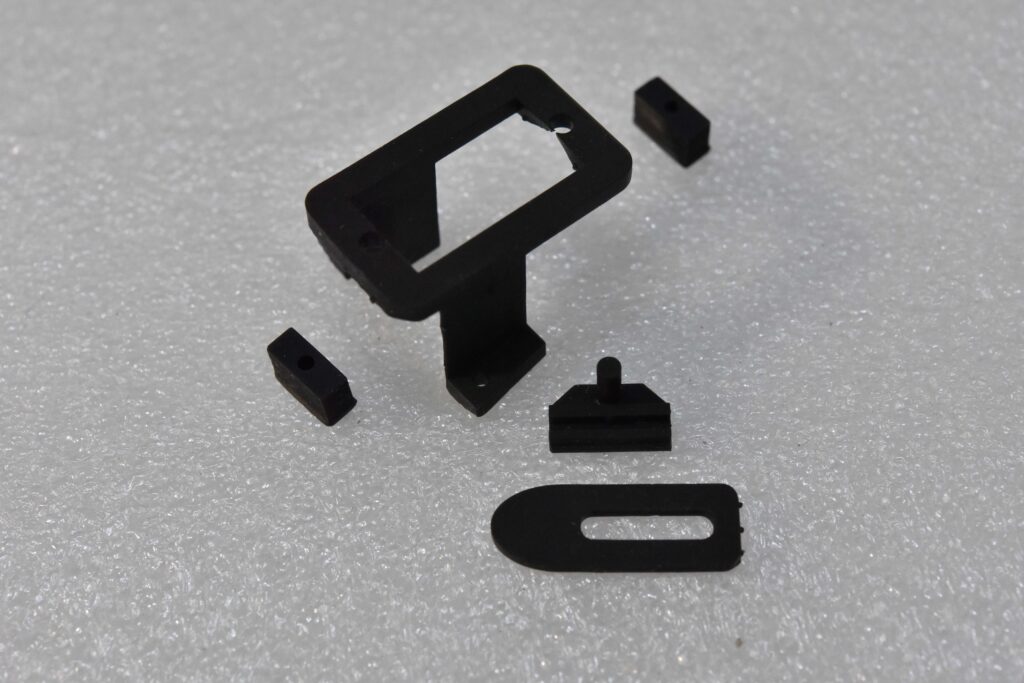
Molding is complete!
The following are the parts I sculpted. The resin I used is SK resin (black), which can be washed with water. (Later; It is not a high-toughness type, but it is not broken even after playing with it for several hours.)
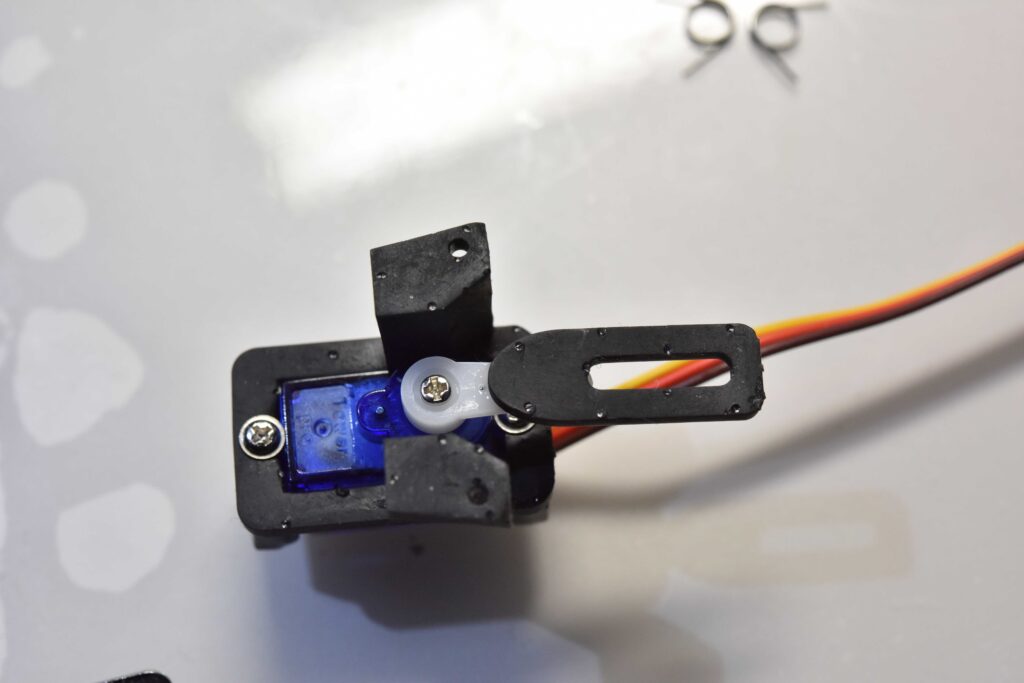
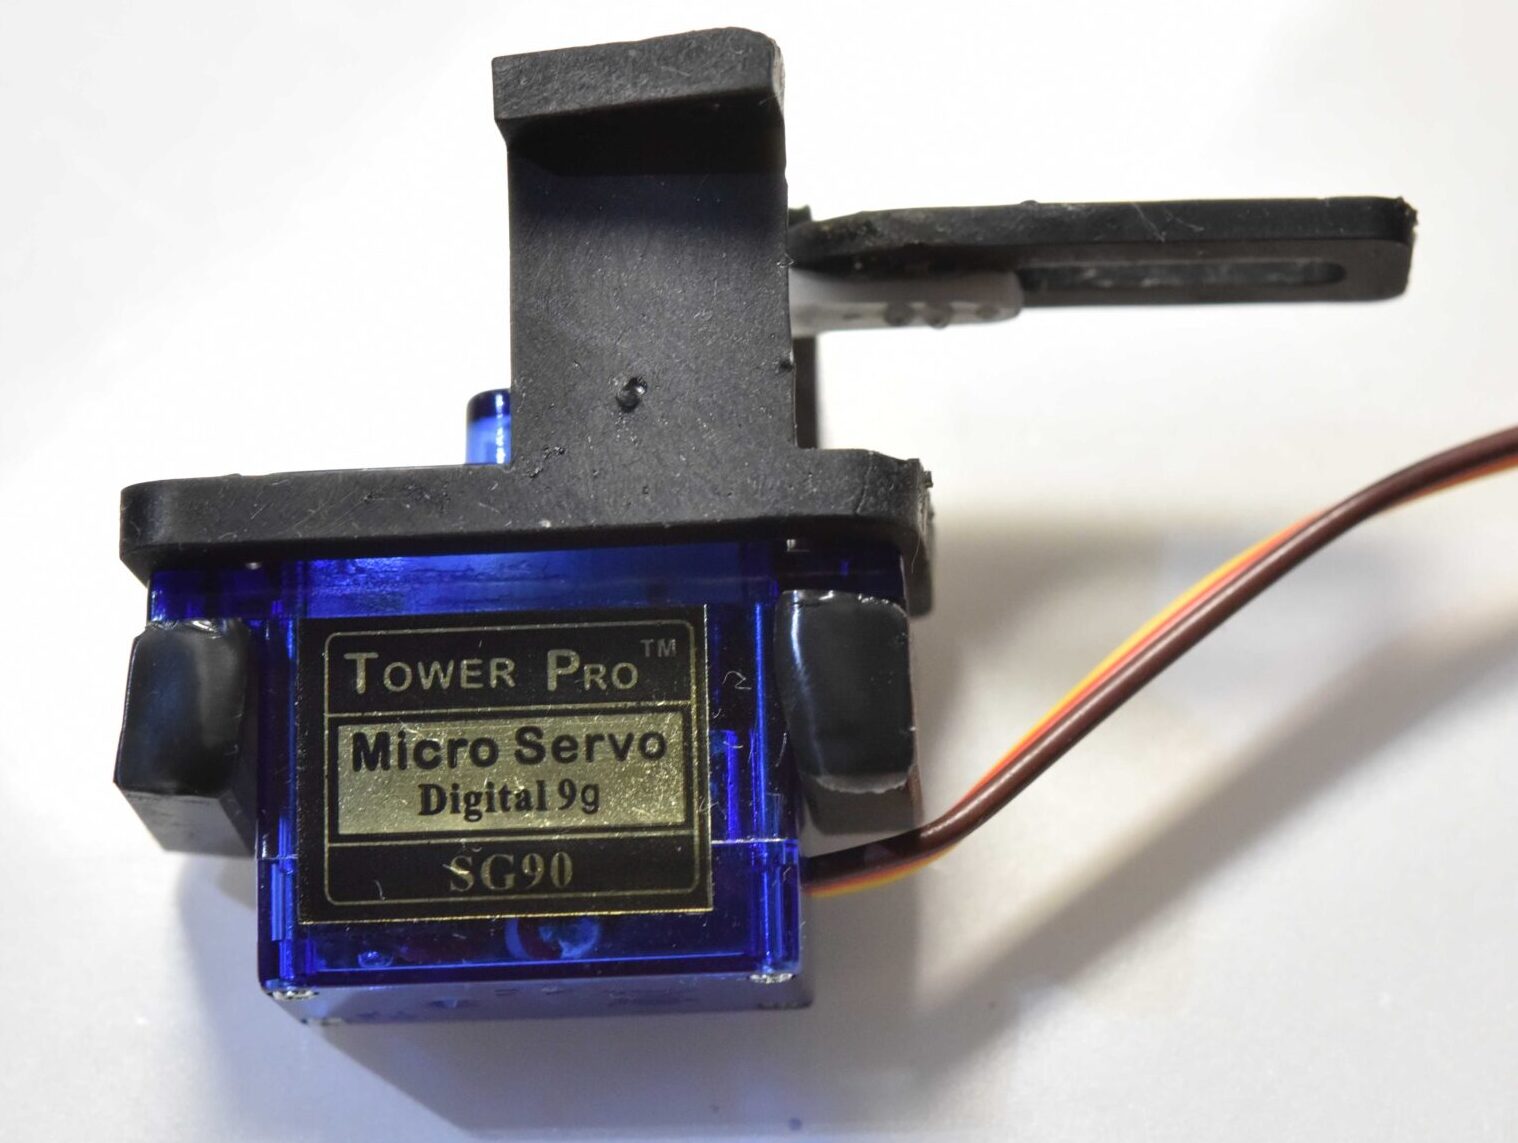
Assembly of molded parts
First, the modeled parts were assembled to the SG90 servo motor. The servo horn was attached with glue.
The parts of the shaft section are installed as follows.
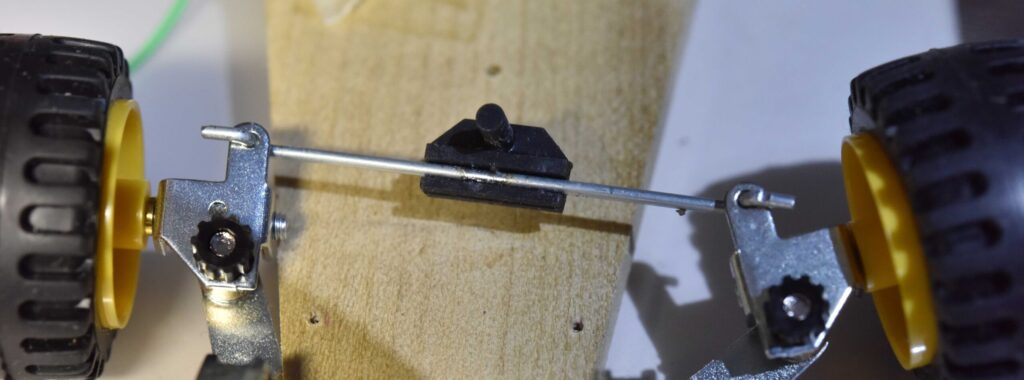
Fix the servo motor parts to the car body to complete.↓

Completion & Operation check
The movement is good. I try to move the damper at the end of the video.
That’s all for this article. Please also see the following articles
Part 2 (pairing PS3 controller with ESP32).

コメント